
M Track Bridge Reversing Layout, 3.0
These include:
The image on the right is a plan I've worked up in Raily for a layout that I can build with what I have. It features two reversing loops, so trains can run one way then the other way down any part of the layout. One of those loops is bridged (raised sections in red), and the other has a yard hanging off of it. Note how the yard looks funny, because I only have right-hand turnouts left by the time I'm done building everything else. That the layout is 8 feet 7 inches by 4 feet 3 inches, so its not a Sunday Afternoon In Front Of The TV layout by any means.
The program has some short-comings, but its been through several versions and is worth a look. The main drawback is that the Manual is only in German. But Alta-vista can help with that, and the program's user interface itself is in English, French, German, and more...
It does far more than Märklin track as well. The author was very smart and created a track module system, which let's you define your own track system by adding a new module, with sizes, uses, etc. There are even modules for Slot Racers, including AFX. This program can lay out everything from Lionel to Bachmann to Atlas to Hornby track. The software also lets you enter in the track you have, and compare that against the track the layout needs to find out what you're missing.

The trees, houses, and even the Engine are objects in the program, and as users make more, they can donate them back to the main repository for the program. We've come a long way since the days when you had to scratch your head for hours while pouring over a typical Märklin track diagram.
I'm going to install an ESU LokPilot 52610 decoder in it, along with a 5 pole rotor and a DC field magnet.
Note: I actually ended up installing the decoder from a Märklin 60760 upgrade kit, but used the motor parts my dealer sent me for the ESU project. The permanent DC magnet from the upgrade kit would not fit the 3036 frame.
Sad State Of Affairs
This engine would not run, and had numerous sins, all caused by me in my earlier years. I had given it up for dead, and declared it a Spare Parts loco. I had already bought a replacement because I missed it so much...
The Stator wiring was shot, I had partially restored it after the ground wire broke by carefully digging out the end of the broken return wire in the windings, and carefully stripping and soldering it. All this using the tip of an Xacto knife while taking care not to cut, strip and short the other wires wound on the stator. When I showed my girlfriend the teeny tiny 0.3mm wire end I had to strip and solder without breaking, under a magnifying glass, she said "You're shitting me."
Note all the other bad solder jobs from previous work. Note the dirty masking tape holding things together. I had also damaged the plastic shoe plate under the front truck when trying to re-solder the wire that had broken off from the brass clip due to age -- I partially melted the plastic inside the brass clip that the pickup shoe presses against.
The gears were also shot, this puppy had served many a year under the Xmas tree, and constant running, cat hair and plain neglect had shark-fined and gouged the gearing's inner surfaces.
This was my best loc when I was a kid, and in trying to service it and keep it running, I had mangled it. I decided that as part of my first conversion, I would tackle all the mechanical problems of getting it running again, as a way of improving my poor mechanical skills.
Stripped down to bare mechanical parts.
Everything electrical (except for some wires) has been removed. Only the motor block and the gearing need work. I had read time and time again that this assembly must function perfectly or your conversion was doomed to failure.
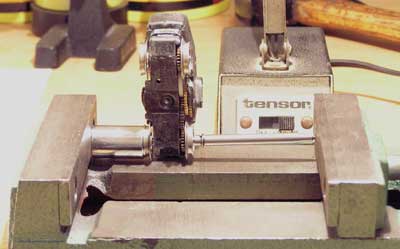
At this point I removed the motor block from the frame and started testing it for smoothness by hand. I would put it on a long straight, fling it by hand and most times it would fly several feet. But sometimes it would catch and jerk to a halt instead of gliding to a stop
Then I remembered how this engine used to run fine for a while, and then catch up and stutter slowly down the track. Reversing it or stopping and restarting it would let it fly again, but every once in a while it would catch...
Close up of shot gears.
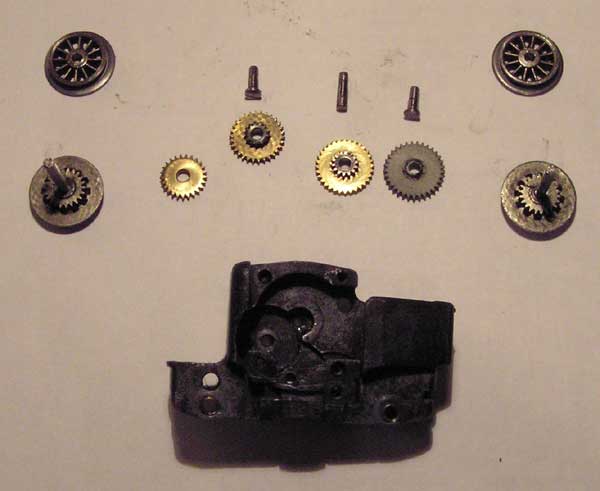
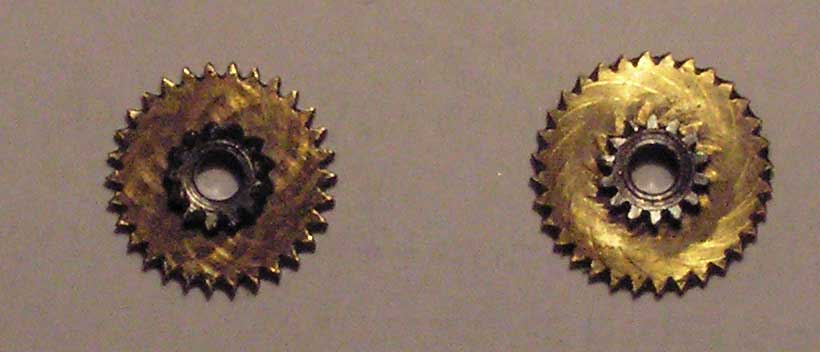
I had read a lot about conversions, and they all said "make sure the loc is mechanically perfect before installing the decoder. Yet my eagerness blinded me to the obvious state of the poor gears.
I posted on the Märklin Bar and Grill with these shots, stating that I thought they were okay, and asking about "acceptable play" in the gearing. I was soundly taken to task. The general response was "Are you nuts? Get new gears."
Upon closer examination of the gears and pictures, I saw the wear, gouging and shark-finning that was causing problems. I accepted the obvious and ordered new gears from Timothy Eckert post-haste.
Vising The Wheels
After a long discussion on the Bar and Grill about rebuilding the motor block, pressing wheels, and new tools, I ended up taking chances and vising the wheels instead of buying the very expensive wheel presses I had been shown. I had also thought I might be able to get some time on a friend's lathe, that didn't work out, so I was kind of stuck.
I tried to imitate the techniques I had seen in photos for these tools, using sockets as wheel cups, a 4-inch drill press vise, and the pin from a center punch when needed. I spent a lot of time learning how to carefully take up tension, eye the alignment, release, adjust, and take up tension again.
This shot shows the beginning of the process, where the punch pin on the right is seriously out of line. Before winding up enough torque on the vise to actually move the wheels on the axle, I would tighten just a bit, check alignment, back off, reset alignment, and tighten just a bit again. This process feels exactly like setting a pin into a bicycle chain.
I practiced by resetting the wheels onto my other 2 dead locs, a 3000 and a 3078. I used a digital caliper to measure distance and runout carefully, and learned to proceed in very small .3mm increments. I got them good enough to pass the same kind of "fling testing" that the 3036's motor block had failed. Then I decided that this might work.
None of this would have been possible without the countless tips I got. But I think these tools are too rough for serious work on complicated engines like my 3102 steamer. I don't recommend this process to anyone, and I'll try to avoid it in the future. I'm starting to price good small hobby lathes...
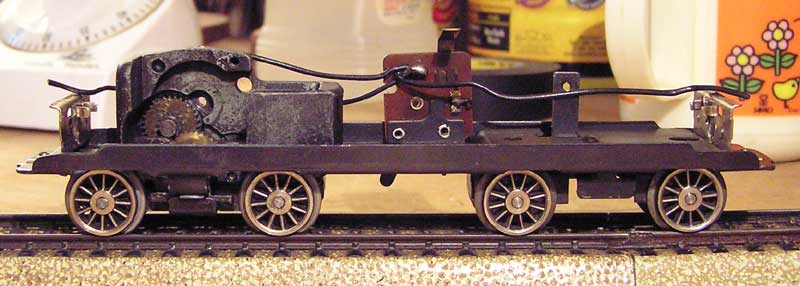
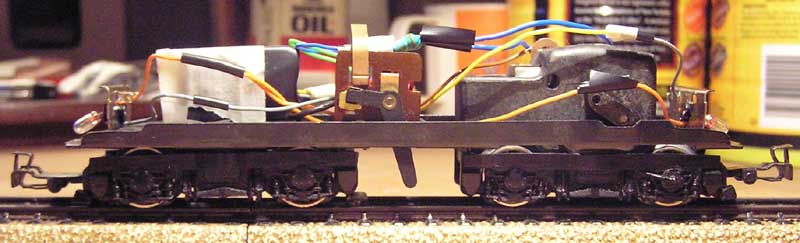
Rebuilt Motor
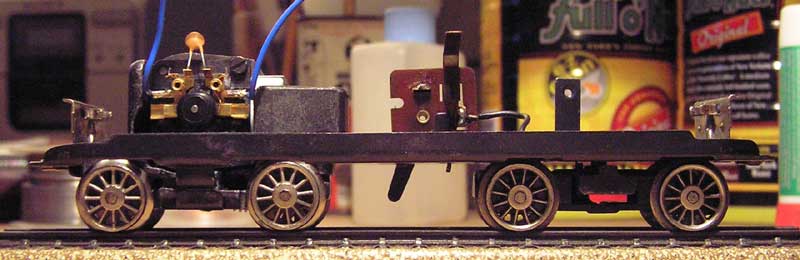
This shot shows the motor block wired and mounted back in the frame. I tested the motor just before mounting by hooking the 2 blue wires up directly to a Mäklin DC transformer (the 67271 Mini-Club Z gauge trafo).
This is one of the many tips I got off of Kurt Miska's excellent page Converting to high efficiency Märklin digital step by step.
I also took the time to file and rebuild the plastic shoe plate, using some perfboard carefully shaped to fit in place of the destroyed bar the brass clip used to wrap around. The clip was pryed open, reshaped, resoldered and then reinstalled on the new brace.
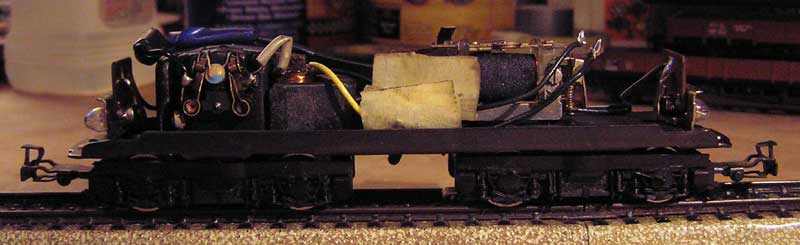
Decoder Installed And Tested
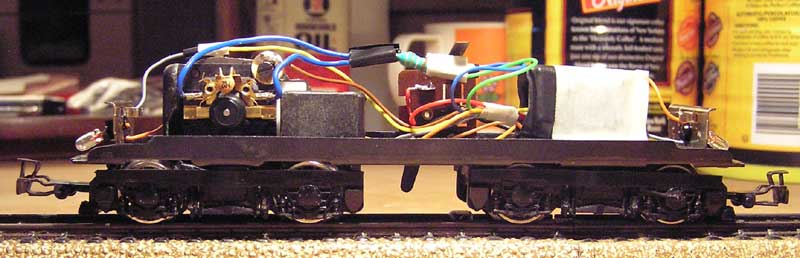
These two shots show the final result of installing the decoder and the lamps, and testing the installation. This is just after final testing with the shell on, the wires still need a final dressing-down.
Note that I actually soldered the power and motor lines twice, following Kurt's advice (see URL above).
I first tested the decoder with the power and motor wires untrimmed, to make sure those connection points worked. Then I trimmed and resoldered the power wires, and installed the lights. I tested the motor and lights with the motor wires untrimmed, and indeed Kurt was right, I had them soldered backwards. Then I trimmed them to length and installed the chokes on the motor lines.
Phoenix From The Ashes
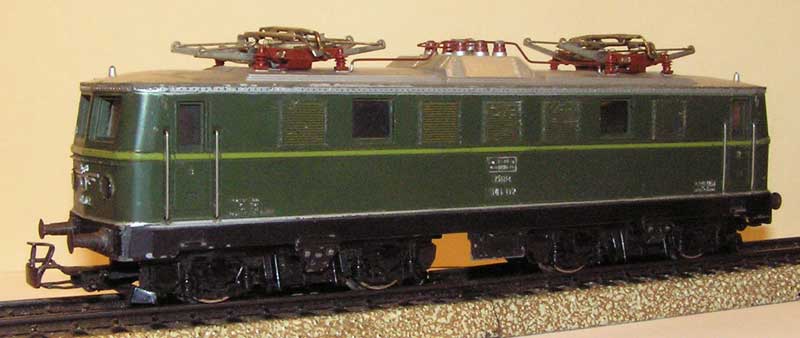
A final close up of the newly risen warrior. Note the abuse to the shell from countless times the loc flew off a curve, or got attacked by the cat. She is reborn as a true killer, and is once again one of the best peforming locs I have, right up there with my AMTRAC 33621 double engine.
Maybe I just worked off some Bad Karma too.